- Plumbing : 0120-4619300-316/+91- 8448793165/ TOLL FREE NO.1800-570-9949 |
- : plumbing@akggroupindia.com
- Electrical : 0120-2973710-713/+91-9818221065 /TOLL FREE NO.1800-570-9949 |
- : electrical@akggroupindia.com
| Fittings | Pipes | |
| Material | Unplasticized Polyvinyl Chloride (UPVC) | Unplasticized Polyvinyl Chloride (UPVC) |
| Colour | Light Grey | Light Grey |
| Reference Standards | IS 14735 : 1999 | IS 13592 : 2013 |
| Working pressure (kg/cm2) | Non Pressure Application | Non Pressure Application |
| End Connections | Rubber Ring & Solvent Joint | Rubber Ring & Solvent Joint |
| Variants | - | Type "A" & Type "B" |
| Nominal Size | Outside Diameter | Type A Wall Thickness(mm) |
Type B Wall Thickness(mm) |
|||
| Min(mm) | Max(mm) | Min(mm) | Max(mm) | Min(mm) | Max(mm) | |
| 75 | 75.0 | 75.3 | 1.8 | 2.2 | 3.2 | 3.8 |
| 90 | 90.0 | 90.3 | 1.9 | 2.3 | 3.2 | 3.8 |
| 110 | 110.0 | 110.40 | 2.2 | 2.7 | 3.2 | 3.8 |
| 160 | 160.0 | 160.5 | 3.2 | 3.8 | 4.0 | 4.6 |
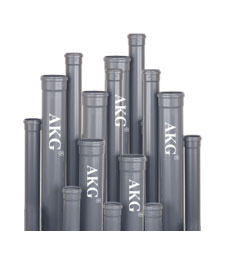
Pipes are available in 75 to 160mm conforming to IS 13592:1992 in both type A & B
It is imperative to mark the pipe from all sides so that pipe is cut with the help of a Hand Saw. It should be a right angle cut from all the sides. The cut piece should not be with burr on edges.
After cutting, the pipe needs to be chamfered from the outer sides. It is advisable to provide approximately 2mm wide, 150 chamfer on spigot end
Remove all the burrs and ridges accumulated on the inner as well as the outer edges of the pipe with the help of a deburring knife, file or abrasive paper.
Before applying solvent cement, insert the pipe end into the socket of the next pipe or fitting to check that interference occurs at about 1/3 to 2/3 of the socket depth.
Thoroughly clean the pipe with dry cloth where the solvent cement is going to be applied to avoid dust, dirt, oil, moisture and other foreign materials during the installation process.
Mark the pipe length to be inserted for jointing. Apply a liberal coat of solvent cement with the help of the brush on the marked surface.
Push the pipe inside the fitting / pipe so that it goes inside equally from all the sides. Wipe off excess solvent cement that comes out from all the edges. Hold the joint for one to two minutes so that the jointing is perfect.
Pipe line should be installed in proper alignment & along with necessary clamps. Pressure testing may be carried out after a curing period of 24 hrs.
| Fittings | Pipes | |
| Material | Unplasticized Polyvinyl Chloride (UPVC) | Unplasticized Polyvinyl Chloride (UPVC) |
| Colour | Light Grey | Light Grey |
| Reference Standards | IS 14735 : 1999 | IS 13592 : 2013 |
| Working pressure (kg/cm2) | Non Pressure Application | Non Pressure Application |
| End Connections | Rubber Ring & Solvent Joint | Rubber Ring & Solvent Joint |
| Variants | - | Type "A" & Type "B" |
© Copyright- AKG Group of Companies. All Rights Reserved.